

Listing your ride is as easy as uploading some photos, inputting a location, and writing a description. While following the prompts for listing online, here are a couple of things to keep in mind:
Rider Height vs Frame Size
We know that the easiest way to define the size of a ride is through the height of the frame. But we also have to make sure renting is comprehensive for all riders, even beginners. In order to do this, we ask that you list bike sizes according to “Rider Height” instead of by frame size. If you decide you do want to include your frame size, please include it in the listing title or description.
Photos
We require that all listings include real photos of your actual ride. Sorry, no stock pictures or beautiful product shots. This is only required so Renters can see the exact bike they are looking to rent. The better the photo, the more likely you are to receive requests.
Photos are also important in-case your ride is damaged or stolen. Detailed photos help assess the amount to be reimbursed by either the Renter or Spinlister.
Components
We recommend that users add as much detail to their listings as possible - one way you can do this is through extras. If you have expensive or unique ride components, this information will not only bring more value to your listing but will also ensure a safer rental agreement in case we need to reimburse you for your ride's value.
Pending approval
"Pending" or "Awaiting Approval" means your listing is in the process of being approved. Our team approves each listing manually to guarantee the quality of rides that go live on the site. If there is something wrong with your listing we will contact you and ask that you make changes or provide more information. We also never approve a listing that contains more than one ride or one that has personal information in the title or description.
Click 'List a Ride' in the top right corner to start your listing

Fill out all required fields and click 'List this Ride' to finish

(iOS) Tap the 'My Rides' tab then tap '+' to start listing a new ride

(iOS) Fill out your ride's information and tap 'List this Ride' when you're done


(Android) Tap 'Listings' then tap '+' in the top right corner to list a ride

(Android) Tap 'Post this Ride' once you have filled out all the required fields

Editing a Ride
You can edit your ride whenever you want! Here’s how to do it on our website:
To edit a ride on our website:
- Start by making sure you are logged in
- Click “Dashboard” from the top navbar.
- On the right sidebar under "My Rides", hover over the ride you want to edit, and then click "Edit"
- Edit the ride to your liking
- Click "Save" when you finish editing.
To edit a ride from the app:
- Ensure you are logged in
- Tap "Listings" or "My Rides" in the bottom menu
- Tap the ride you want to edit
- Edit to your liking
- Tap "Save" when you are done editing
Unlisting and deleting
We know, you're not going to be available to rent out your ride 24/7 - 365. So what do you do if there are certain dates or times you can't rent it out?
Unlisting temporarily
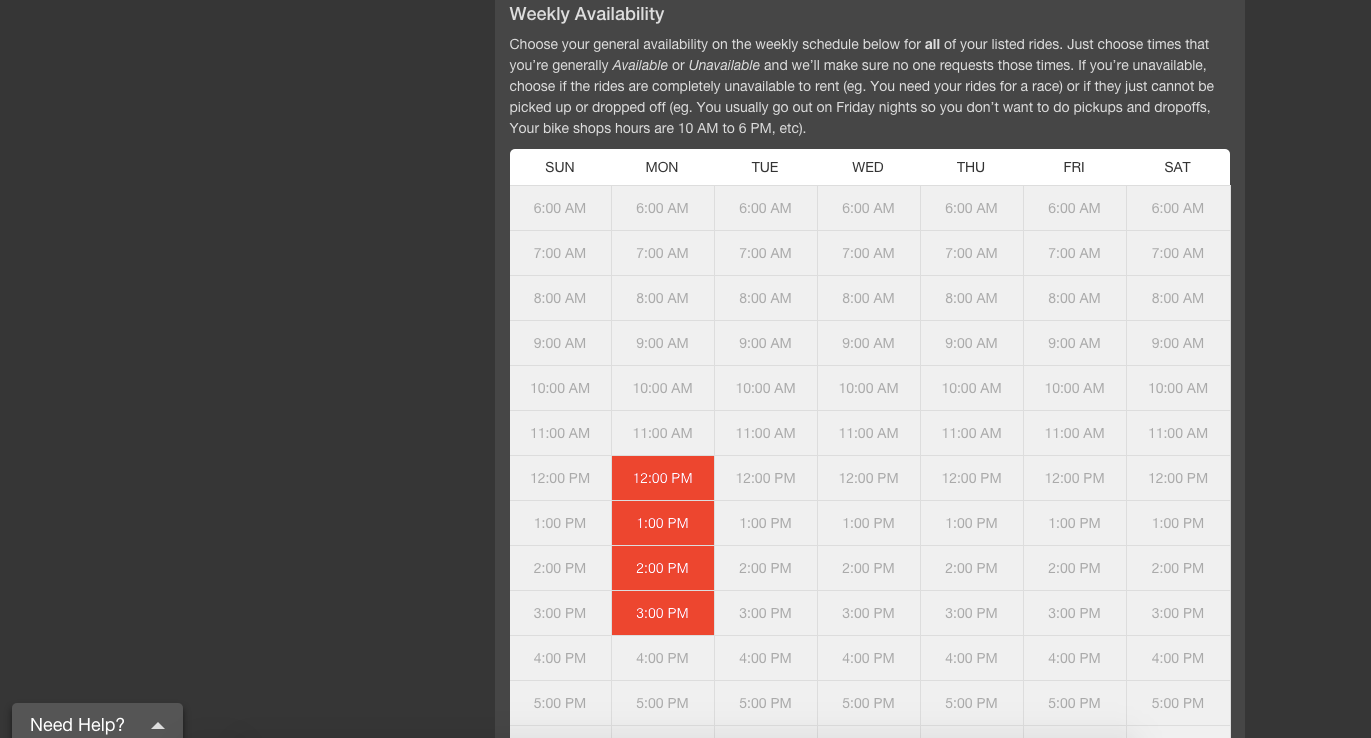
Say you start work in the morning at 9 and you end at 5 - or maybe you'll be out of town for a couple of days next week. This is the perfect opportunity to utilize our new availability calendar! Using the calendar, you can mark off specific times and/or dates that you are unavailable to rent out your ride. Just as a heads up, any changes made to an availability calendar will affect ALL rides owned by that user.
You have two options to set to your calendar:
- Unavailable - means that a Renter cannot have your ride at any point that you have marked it unavailable. Use this if the ride itself is being used during those dates or times (For example, if you are using your ride for a race on April 5th, you would mark April 5th as unavailable. OR if you ride to work in the morning from 8-9AM, you would set 8-9AM as unavailable Monday through Friday)
- No pickup or drop-off - means that you are not available to pass the ride off to a Renter during these times (For example, if you keep your ride at home and you work from 9-5, you would set "No pickup or drop-off to 9-5 Monday through Friday". This way, a Renter could pick up your ride before 9 and drop it off after 5 PM if they so choose).
Once again, the calendar applies to ALL rides on your account.
Go to "Settings" then click "Availability Calendar" to access your calendar

You can also choose the times your ride will be unavailable (Ride will be unavailable every week during these times)
Unlisting a ride
Some users know that a certain ride will be unavailable for a period of time, but they still want to save their info. on Spinlister because they might decide to list again. This is the perfect opportunity to unlist your ride temporarily. To do so:
- Sign into your profile at Spinlister.com
- Choose “Dashboard” from your horizontal dropdown menu
- Under "My Rides" on the right hand side, hover over the ride you'd like to edit
- Under your ride's picture, click the button that says "Unlist"
Your ride will not show up to other users while it's unlisted, but we save the information on it so you can re-list it at any time!
Deleting a ride
Sometimes stuff happens and you have to get your bike out of the system altogether. Maybe your ride is totaled, or you ended up selling it to someone else. Whatever the case, be sure to delete it from the system so you don't get unwanted requests! To delete your ride:
- Sign into your profile at Spinlister.com
- Choose “Dashboard” from your horizontal dropdown menu
- Under "My Rides" on the right-hand side, hover over the ride you'd like to edit
- Under your ride's picture, click the button that says "Delete"